

A small galley kitchen doesn’t have to feel cramped or compromise on style. You can convert even the tightest space into a highly functional, visually appealing kitchen with the right design strategies. From choosing a single-wall layout to installing statement pendant lighting, each decision impacts both workflow and aesthetics. These 14 practical ideas will show you exactly how to maximize every inch — and some solutions might surprise you.
Choose a Single-Wall Layout for the Tightest Galley Kitchens
When space is extremely limited, a single-wall layout is your best option for a functional galley kitchen. This design maximizes space efficiency by placing all appliances, cabinets, and countertops along one wall. You’ll free up essential floor space, making movement easier and more comfortable throughout your kitchen.
Layout optimization becomes straightforward when you arrange your workspace strategically. Follow these key steps:
- Position your refrigerator at one end for easy access
- Place your stove in the center for balanced workflow
- Install your sink near a window for natural light
You don’t need a large kitchen to create an efficient, stylish space. A single-wall layout gives you complete control over your kitchen’s functionality without sacrificing comfort or design.
Use Light Colors to Make Galley Kitchen Walls Feel Far Apart
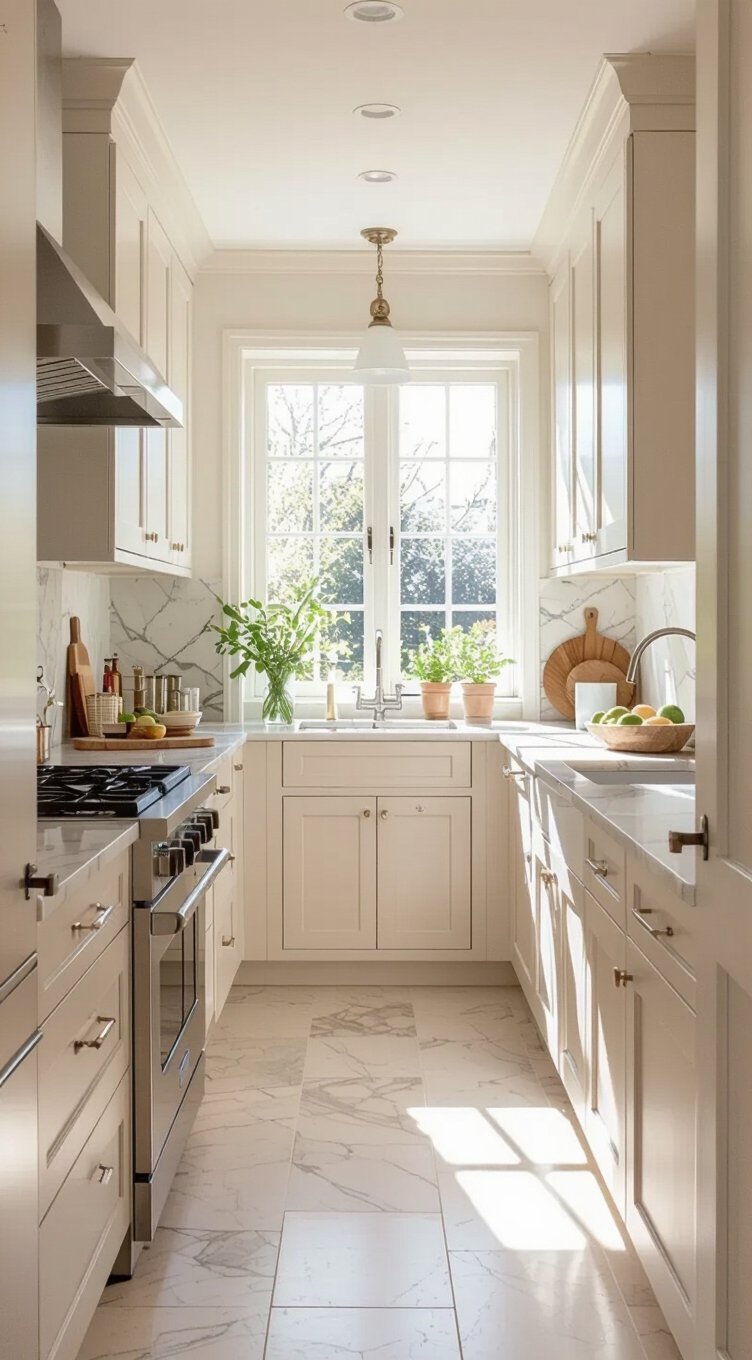
Once you’ve optimized your single-wall layout, it’s time to tackle one of the most powerful design tools available: color. Light hues naturally push walls apart visually, giving your galley kitchen a more open, breathable feel. You’re not locked into stark white — soft creams, pale grays, and gentle sage greens all create an airy palette that expands your space without renovation costs.
Here’s how to apply this effectively:
- Paint walls and upper cabinets the same light tone to eliminate visual interruptions.
- Choose light-reflective finishes like satin or semi-gloss to bounce natural and artificial light throughout the space.
- Extend your color choice to the ceiling for a seamless, height-enhancing effect.
Consistency is your greatest ally in a narrow kitchen.
Go Glossy or Mirrored to Bounce Light Around a Small Kitchen
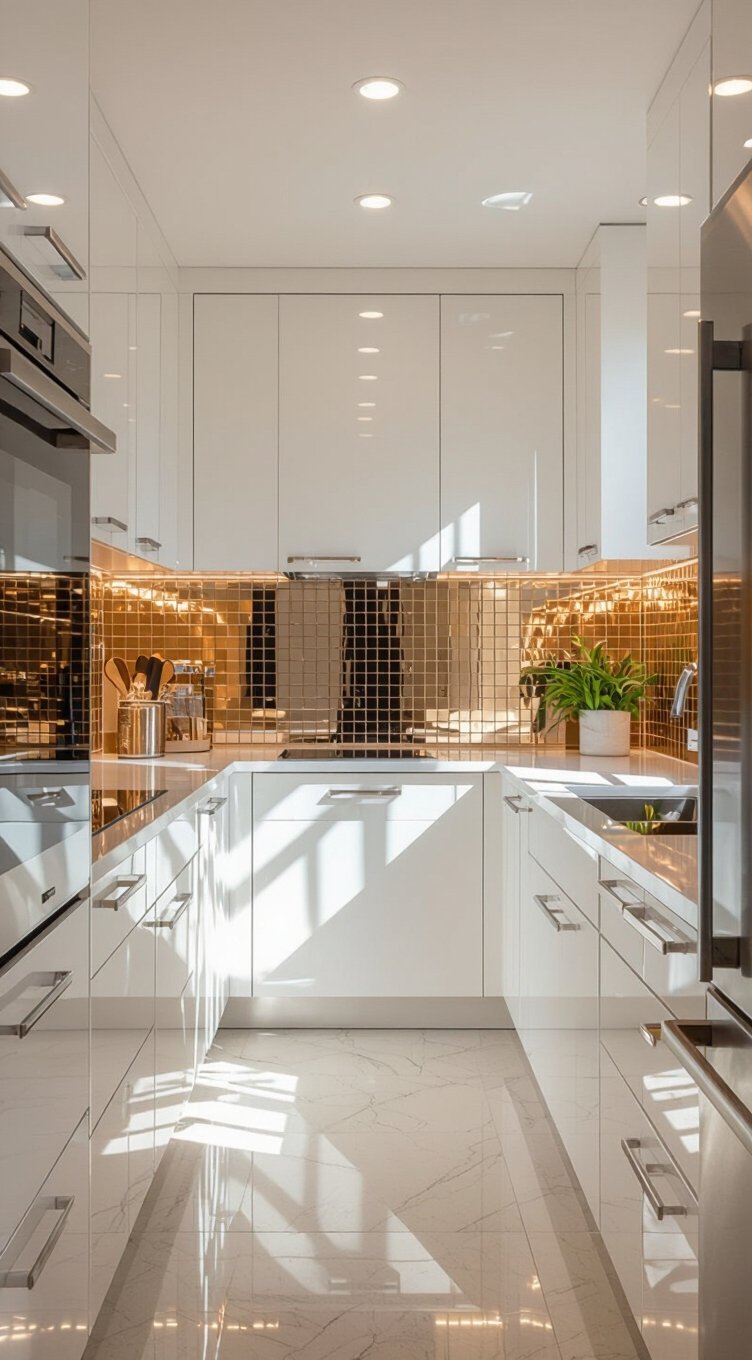
Glossy and mirrored surfaces are among the most effective tools you can use to visually expand a small galley kitchen. Reflective surfaces bounce natural and artificial light across the room, making tight spaces feel open and breathable. Consider installing mirrored backsplashes behind your countertops to instantly double the perceived depth of your kitchen. High-gloss cabinet finishes work similarly, reflecting light rather than absorbing it. You don’t need an expensive renovation to achieve this effect. Even small additions, like glossy tiles or a mirrored panel between upper and lower cabinets, create meaningful visual impact. These strategies give your kitchen a polished, airy feel without structural changes. Choose reflective elements strategically, and your galley kitchen will feel like a space you’ve truly liberated from its original limitations.
Filter Natural Light With a Minimal Window Treatment
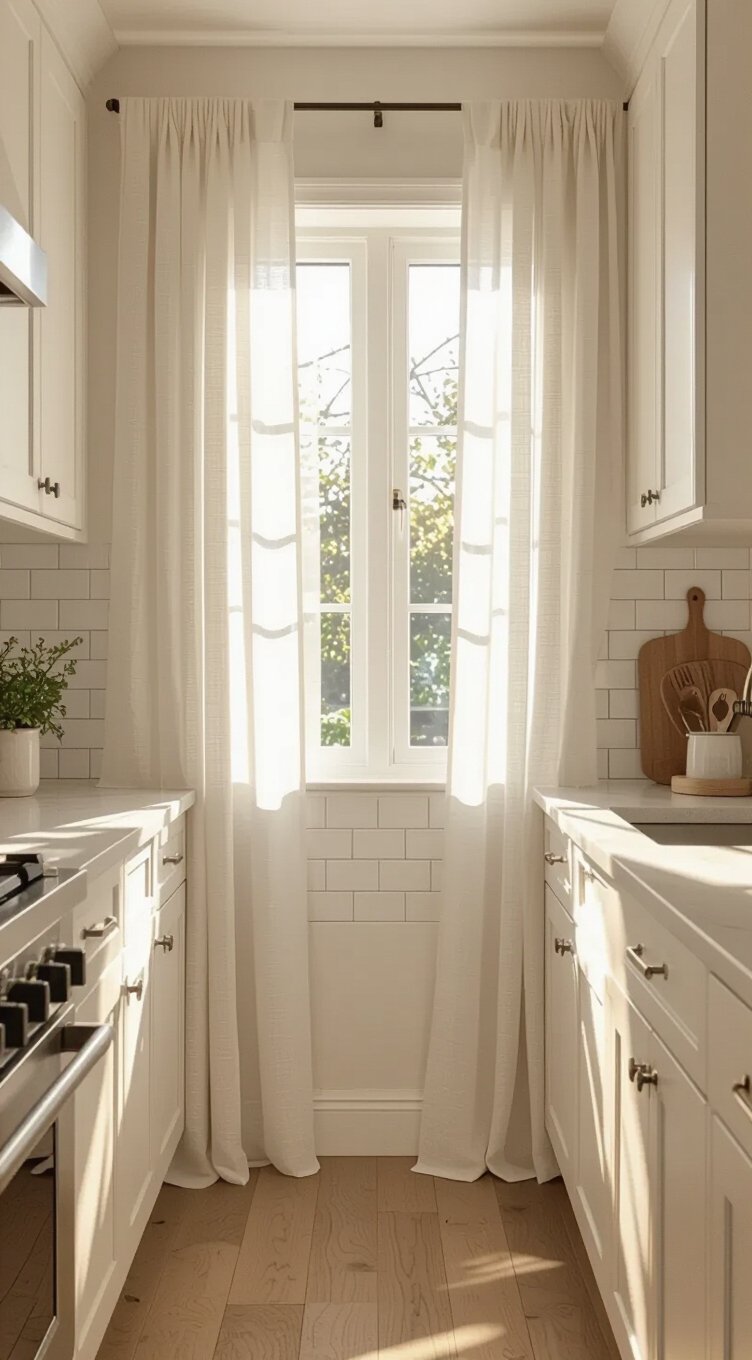
Natural light is one of your most powerful allies in a small galley kitchen, so protecting it matters. Heavy drapes steal precious brightness, making your space feel smaller and more confined. Instead, choose window treatments that filter light without blocking it completely.
Sheer curtains are a smart, flexible option that softens harsh sunlight while keeping your kitchen feeling open and airy. You can pull them aside easily whenever you want full, unobstructed light flooding in. Bamboo blinds offer another excellent choice, adding natural texture and warmth without overwhelming the space. They roll up completely, giving you total control over how much light enters. Both options let you own your space on your terms, balancing privacy and brightness effortlessly throughout the day.
Install Under-Cabinet Lighting for Depth and Function
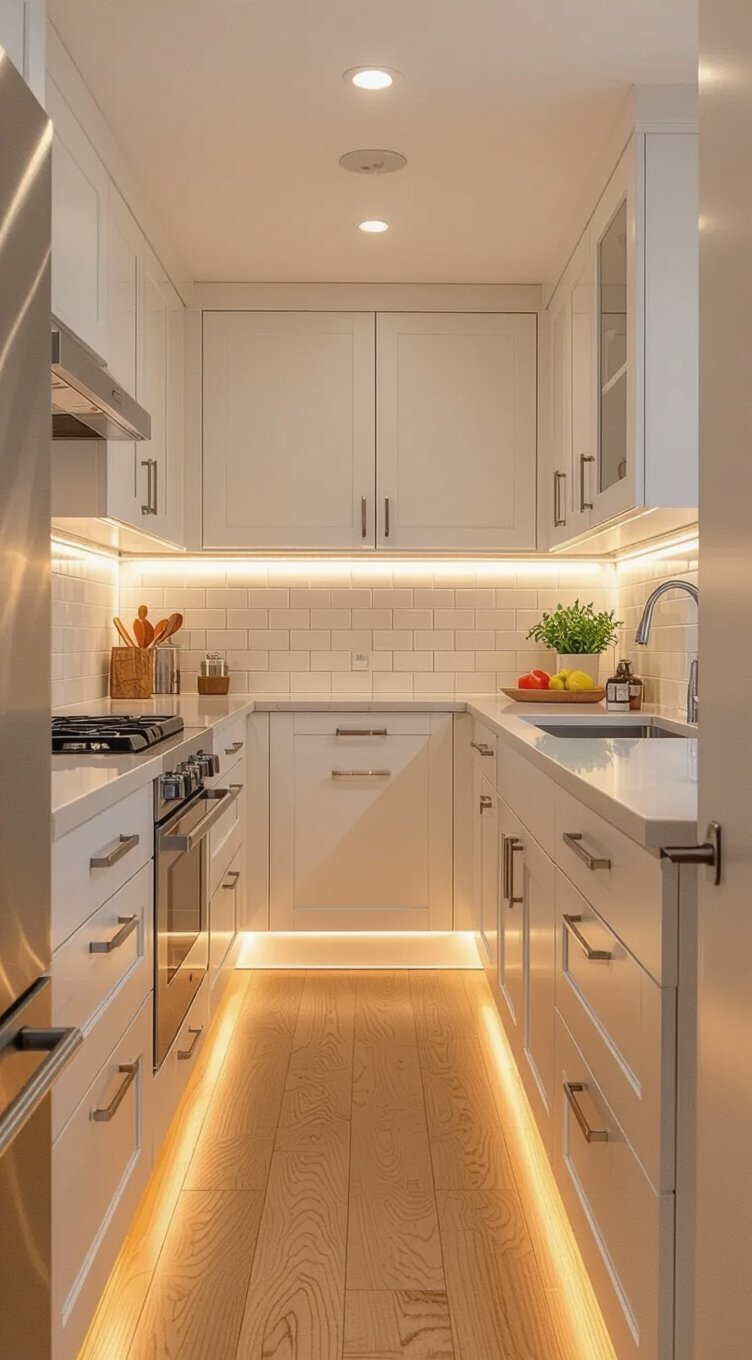
Under-cabinet lighting changes your galley kitchen by adding both depth and practical task lighting where you need it most. Unlike pendant brightness, which draws the eye upward, under-cabinet lights cast a warm glow directly onto your countertops, making meal prep safer and more efficient.
Consider these fixture placement tips to maximize impact:
- Position lights toward the front edge of cabinets to reduce shadows on your workspace.
- Choose LED strip lights for energy efficiency and consistent, adjustable brightness.
- Layer your lighting by combining under-cabinet fixtures with overhead sources for a balanced, vibrant kitchen environment.
You don’t need a major renovation to install these lights. Plug-in options offer flexibility without permanent commitment, giving you full control over your kitchen’s atmosphere and functionality.
Hang a Bold Backsplash to Lead the Eye Down the Length
A bold backsplash is one of the smartest design moves you can make in a small galley kitchen. It creates visual continuity that pulls the eye naturally from one end of the kitchen to the other, making the space feel longer and more intentional.
Choose bold patterns like elongated subway tiles, geometric shapes, or hand-painted Talavera tiles laid horizontally. This horizontal movement tricks the eye into perceiving greater length. You’re not just decorating a wall — you’re directing attention and expanding the space visually.
Keep the pattern consistent across the full length of the backsplash without interruption. Avoid mixing too many competing designs. One strong, confident choice delivers far more impact than several conflicting elements, giving your galley kitchen a purposeful, polished, and liberated aesthetic.
Maximize Upper Cabinets All the Way to the Ceiling
While a striking backsplash draws the eye across your galley kitchen’s length, your upper cabinets can work just as hard by drawing it upward. Don’t stop your upper cabinets at the standard height — extend them all the way to the ceiling. This simple upgrade eliminates that awkward gap where dust collects and reclaims essential storage zones you didn’t know you had. Use ceiling height to your advantage by organizing cabinets into two distinct layers: everyday essentials within easy reach below, and seasonal or rarely used items stored above. You’ll free up counter space and reduce visual clutter simultaneously. Taller cabinets also make your galley kitchen feel grander and more open, giving you the expansive, functional space you’ve always wanted.
Choose Handleless Cabinets to Keep the Space Looking Uncluttered
Hardware might seem like a small detail, but it can make or break the visual flow of a galley kitchen. Handleless cabinets adopt a minimalist design that removes visual clutter instantly. Without protruding knobs or pulls, your eye moves freely across sleek finishes, making the space feel wider and more open. Push-to-open mechanisms and integrated finger pulls are two popular options that keep surfaces smooth and clean. They also eliminate the frustration of catching clothing or bags on hardware as you move through the narrow corridor. You’ll find handleless styles in various materials, including matte lacquer, wood veneer, and high-gloss acrylic. This approach gives you a kitchen that looks intentional, polished, and completely unrestrained by unnecessary ornamentation, exactly the kind of freedom a well-designed space should offer.
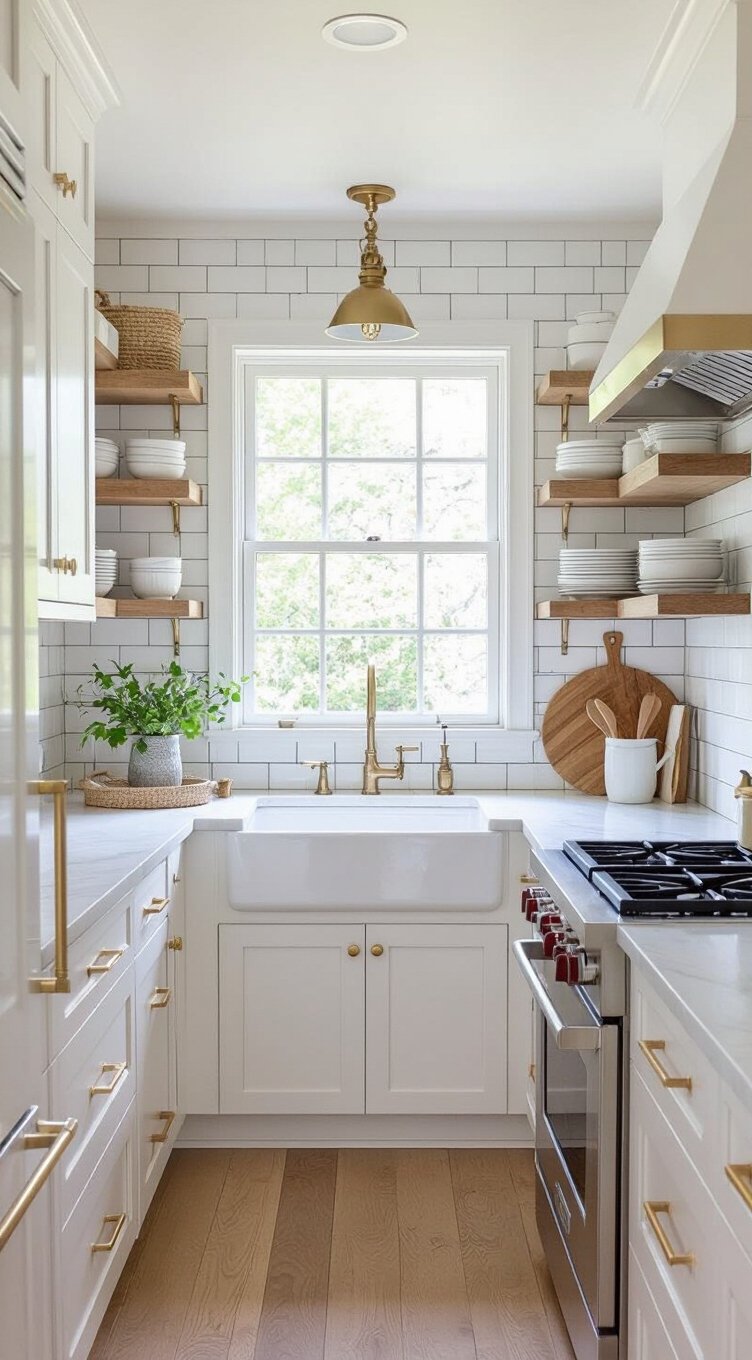
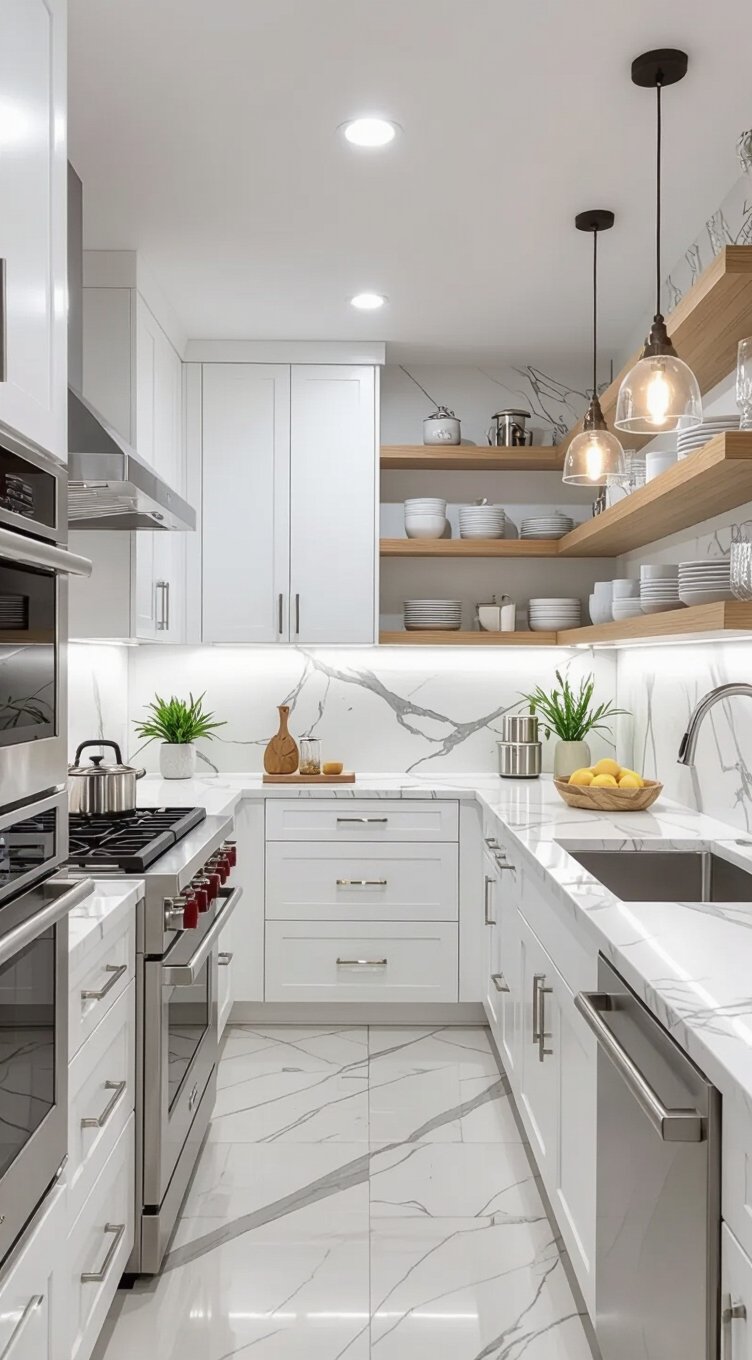
Swap Upper Cabinets for Open Shelving on One Side
Swapping upper cabinets on one side for open shelving instantly makes a galley kitchen feel less boxed-in and more breathable. You’ll open up sightlines, reduce visual weight, and create a layout that doesn’t feel like it’s closing in on you. Open shelving gives you the freedom to display what matters while keeping everyday essentials within easy reach.
Consider adding rustic accents like reclaimed wood shelves or wrought iron brackets to bring warmth and character to your space. Here’s how to make it work:
- Style intentionally – Display matching dishes, glassware, or plants.
- Keep it edited – Avoid overcrowding shelves with unnecessary items.
- Balance both sides – Use closed cabinets opposite for hidden storage.
You’ll gain both function and a kitchen that feels genuinely yours.
Mount Your Microwave to Free Up Galley Counter Space
Mounting your microwave is one of the smartest upgrades you can make in a small galley kitchen. Proper microwave placement instantly reclaims essential counter space, giving you more room to prep, cook, and move freely. Wall mounting keeps your appliance accessible without sacrificing the workspace you desperately need.
Consider these practical wall mounting options:
- Over-the-range installation — Position your microwave above the stove to combine ventilation and cooking functions in one spot.
- Upper cabinet mounting — Secure the unit beneath existing cabinets to keep counters completely clear.
- Dedicated wall bracket — Install a sturdy bracket at eye level for easy access without blocking natural light.
Each option frees up counter space while maintaining an organized, functional layout that truly works for you.
Organize Deep Drawers to Unlock Hidden Storage
Deep drawers are one of the most underused storage assets in a small galley kitchen, but smart organization converts them into powerhouse spaces. You can reclaim serious storage freedom by adding drawer dividers that create dedicated zones for pots, lids, and utensils. These dividers eliminate the frustrating jumble that buries items and wastes your time searching.
Stack pots strategically by nesting smaller ones inside larger ones, keeping lids upright in a divider slot. Use corner trays to maximize every inch of awkward drawer edges, where space often goes completely to waste. You’ll be surprised how much a galley kitchen can hold once each drawer has a clear, organized purpose. Take control of your space, and it’ll work harder for you every single day.
Use Vertical Space for Pot Racks and Magnetic Strips
Once your drawers are dialed in, it’s time to look up and use the vertical space your galley kitchen offers. Wall mounted racks free your counters by keeping pots, pans, and utensils within easy reach overhead. You’re reclaiming square footage without sacrificing access to your most-used tools.
Magnetic knife holders are another smart vertical solution. Mount one along an empty wall section, and you’ll instantly clear a drawer while keeping your knives visible and safely stored. That’s one less cluttered surface slowing you down.
Together, these two upgrades let your kitchen walls do real work. You’re no longer limited by counter or cabinet space. Going vertical means more room, better organization, and a kitchen that truly works on your terms.
Use a Slim Rolling Cart to Add Work Surface Without Narrowing the Aisle
A slim rolling cart gives you an instant work surface that disappears the moment you need more aisle space. This flexible solution hands you control over your kitchen layout without any permanent commitment. When you need extra workspace for chopping, staging, or prepping, simply roll the cart into position. When you’re done, tuck it beside the refrigerator, under a counter overhang, or into a nearby corner.
Choose a rolling cart with shelves underneath to store small appliances, cookbooks, or pantry overflow. Models with butcher block tops double as cutting surfaces, adding real function without sacrificing style. A cart with locking wheels stays firmly in place while you work. You’re not locked into one configuration — your kitchen moves with you.
Hang a Statement Pendant to Anchor the Space Visually
While a rolling cart handles your practical layout needs, lighting choices shape how the whole space feels. A statement pendant gives your galley kitchen a strong visual anchor without stealing precious square footage.
Pendant scale matters more than most people realize. Choose a fixture that’s proportional to your ceiling height and countertop length. Fixture proportion should balance with your cabinet lines, not overpower them.
Follow these guidelines when selecting your pendant:
- Size: Pick a pendant 6–12 inches narrower than your countertop width.
- Height: Hang it 30–36 inches above the counter surface.
- Style: Choose a bold shape or finish that expresses your personality freely.
One well-placed pendant changes a plain galley into a space that feels intentional, curated, and completely yours.
Frequently Asked Questions
What Is the Minimum Width Required for a Functional Galley Kitchen?
You’ll need at least 8 feet of width for a functional gal perceived kitchen. This lets you control kitchen zoning and smart appliance placement, giving you the freedom to move and cook efficiently without feeling cramped.
Can a Galley Kitchen Work as an Open-Plan Layout?
Yes, you can absolutely convert your galley kitchen into an open concept layout! By removing non-load-bearing walls, you’ll enhance space flow, giving you the freedom to connect your kitchen seamlessly with living and dining areas.
How Do I Add an Island to My Galley Kitchen?
You can add an island by choosing a compact, movable design that fits your space without blocking flow. Incorporate island lighting above it and compact seating on one side to maximize both function and freedom.
What Flooring Materials Work Best in Small Galley Kitchens?
For your small galley kitchen, you’ll love luxury vinyl plank or porcelain tile — both offer durable finishes and slip resistance. They’re easy to maintain, letting you move freely without worrying about damage or accidents underfoot.
How Do I Improve Ventilation in a Narrow Galley Kitchen?
Install a powerful range hood above your cooktop to pull smoke and odors out fast. You’ll also enhance air circulation by opening a nearby window or adding a small exhaust fan to keep your kitchen fresh and free.
Conclusion
Your small galley kitchen doesn’t have to feel cramped or limiting. By choosing smart layouts, light colors, and reflective surfaces, you can change even the tightest space into a highly functional cooking area. Don’t underestimate vertical storage, strategic lighting, and slim additions like rolling carts—they’ll maximize every inch. With these 14 design ideas, you’ve got everything you need to create a stylish, efficient kitchen that works hard without sacrificing good looks.