

You don’t need a large kitchen to cook efficiently — you just need the right layout. A small U-shaped kitchen offers more storage, counter space, and workflow than most people realize. But without smart planning, it can quickly feel cramped and frustrating. The good news is that 14 proven strategies can reshape even the tightest U-shaped kitchen into a highly functional space. What you uncover next might completely change how you approach your kitchen’s design.
Keep the Walkway Width Right in a U-Shaped Kitchen
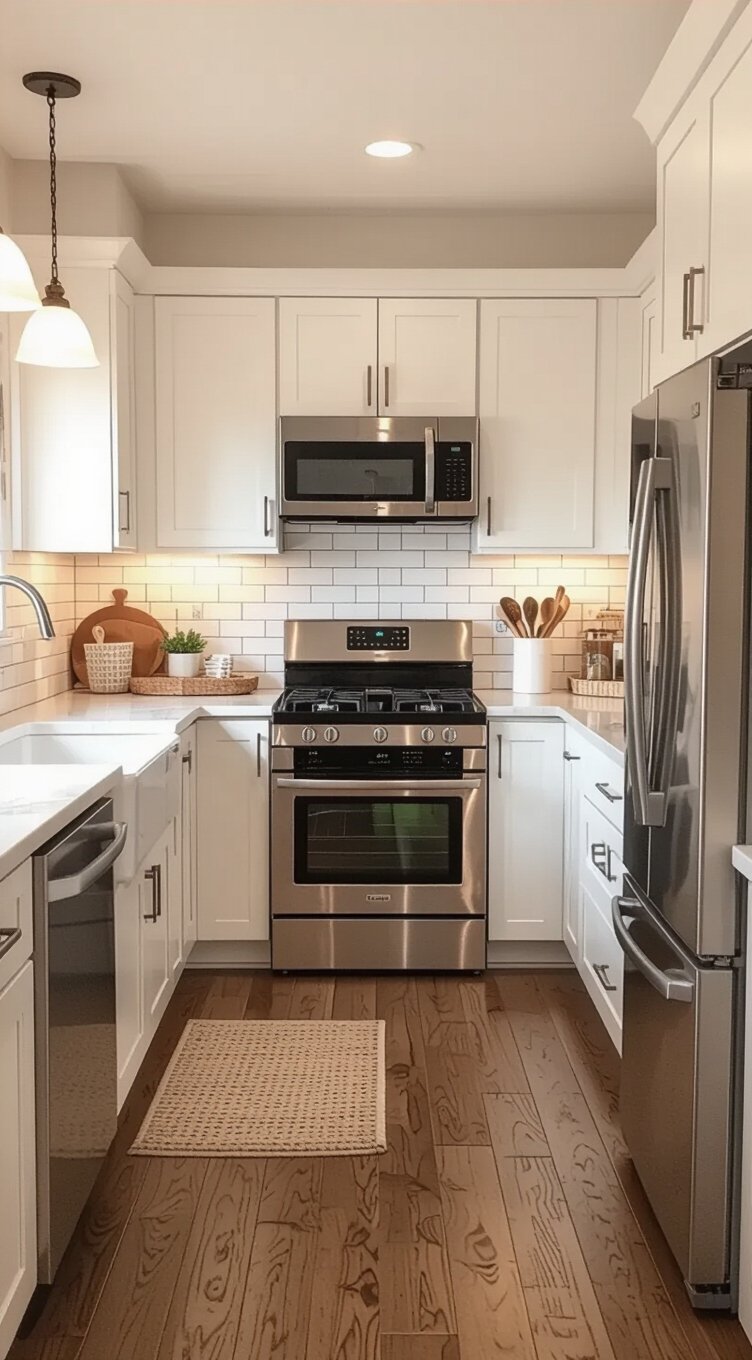
The walk游戏副本 width in a U-shaped kitchen can make or break your cooking experience. Getting your walkway clearance right gives you the freedom to move without feeling cramped. Aim for at least 42 inches of clearance for a single cook. If multiple people share your kitchen, extend that to 48 inches minimum.
Proper traffic flow keeps your kitchen functional and stress-free. Here’s how to achieve it:
- Measure your space before purchasing appliances or cabinetry.
- Position your refrigerator at the open end of the U-shape for easy access.
- Avoid placing obstacles like bar stools within the main work zone.
These simple adjustments convert your kitchen into an efficient, open space where cooking genuinely feels enjoyable.
Use Light Colors to Make the Space Feel Bigger
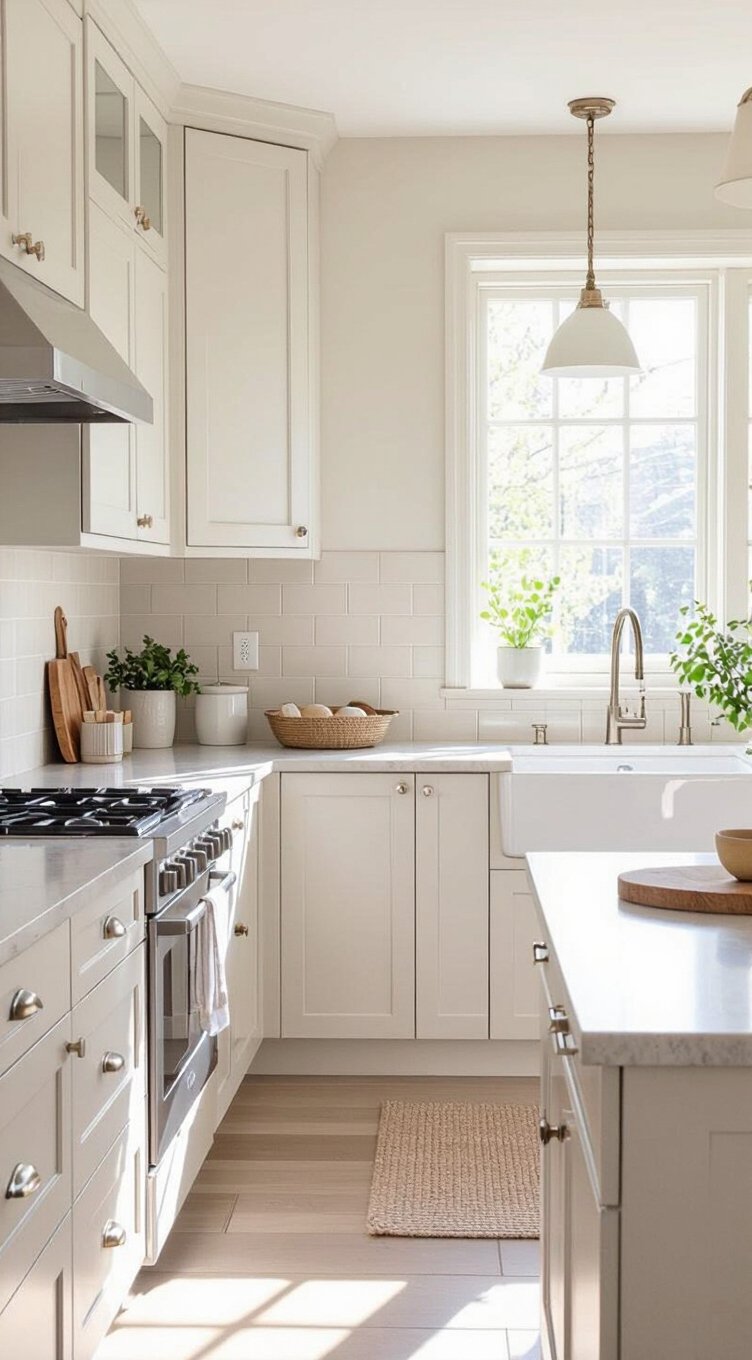
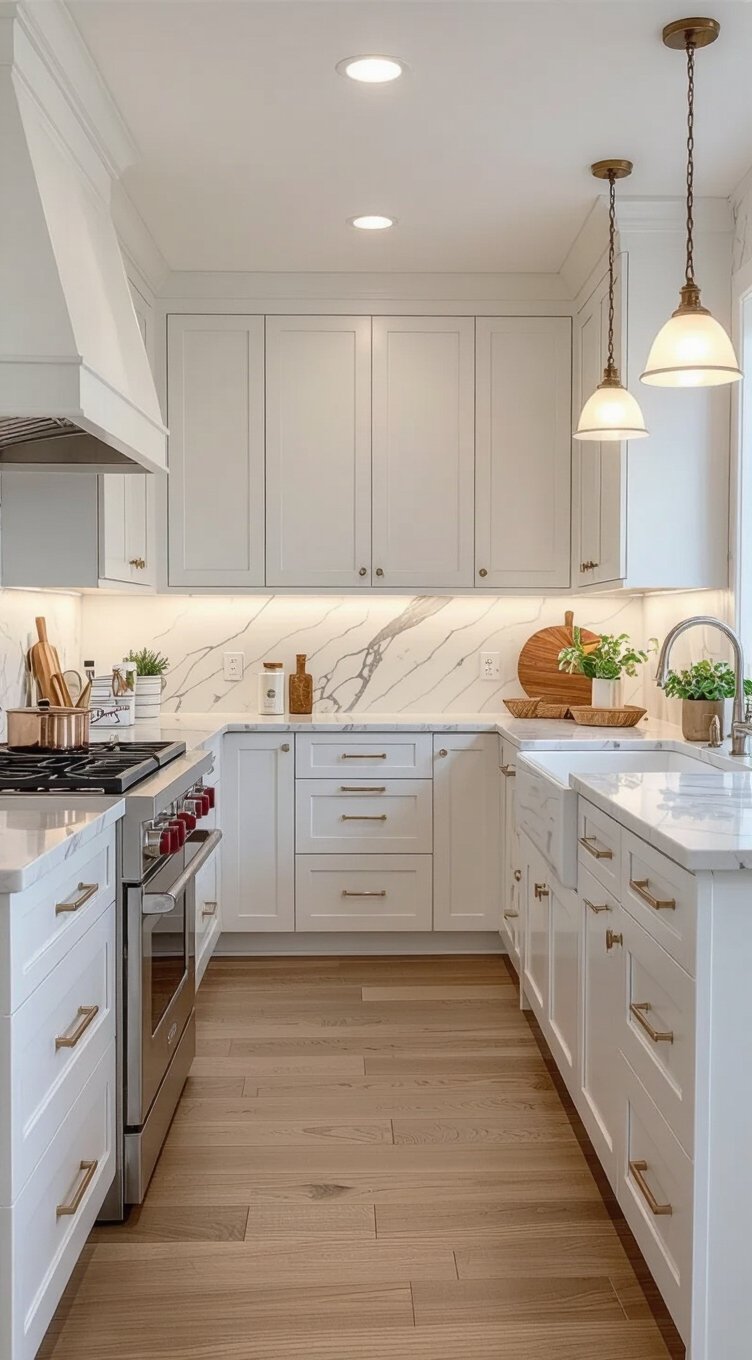
When you’re working with a small U-shaped kitchen, light colors are one of your most powerful design tools. Bright tones like soft white, cream, and pale gray reflect natural and artificial light effectively. This reflection creates the illusion of a larger, more open space. An airy palette on your cabinets, walls, and countertops works together to visually expand every corner. You don’t have to sacrifice personality either. Try adding subtle contrast through light sage green or warm beige accents. Keep your upper cabinets lighter than your lower ones to draw the eye upward. This technique makes your ceiling feel higher instantly. Choose light-colored backsplash tiles to reinforce the effect throughout the entire kitchen. Small changes in color can completely alter how spacious your kitchen feels.
Choose Compact Appliances Made for Tight Kitchens
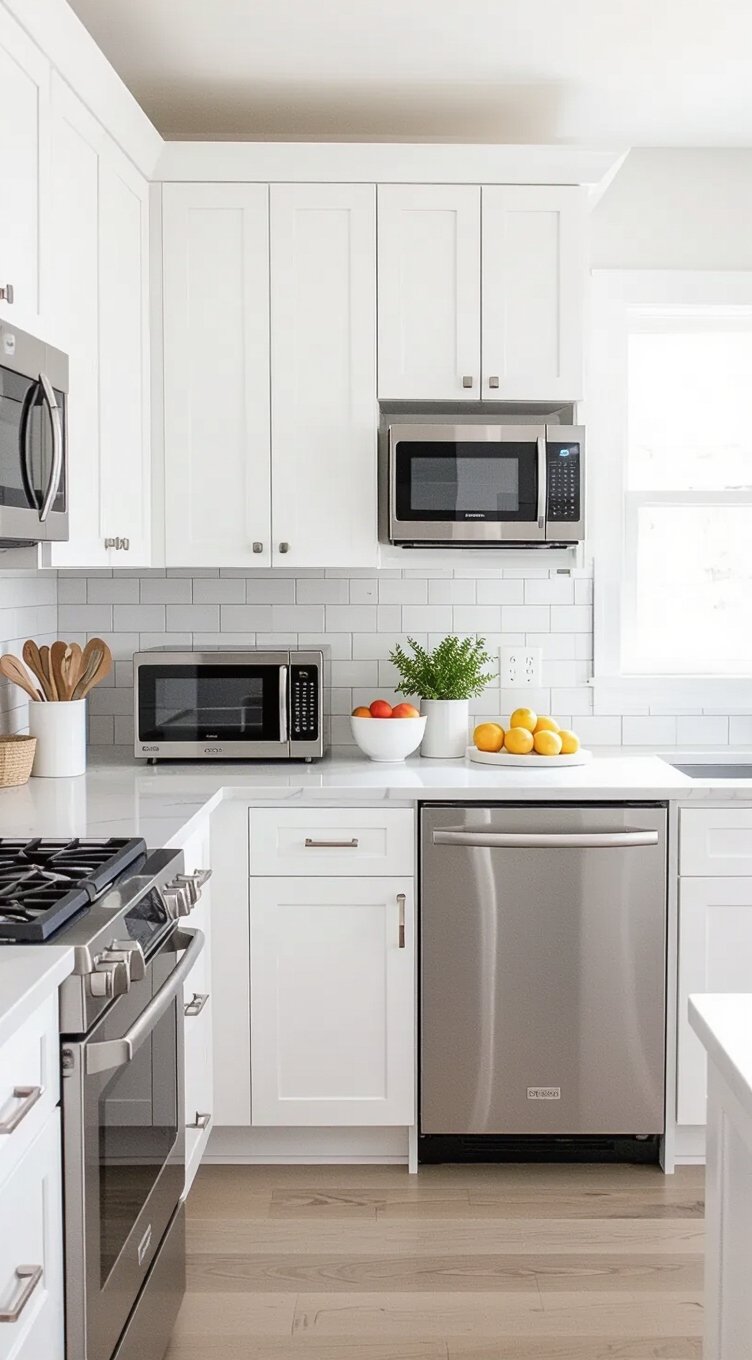
Compact appliances designed for tight spaces can completely change how your small U-shaped kitchen functions day to day. You don’t need full-sized machines to cook great meals and live freely. Today’s market offers brilliant space saving options built specifically for smaller kitchens.
Consider these smart appliance choices:
- Slim dishwashers — 18-inch models clean effectively while freeing up essential cabinet space.
- Counter-depth refrigerators — These energy efficient units sit flush with your cabinets, maximizing your walkway.
- Two-burner induction cooktops — Portable, powerful, and easy to store when not needed.
- Combination microwave-convection ovens — One appliance handles multiple cooking functions brilliantly.
Each choice gives you back control over your kitchen layout. You’re not sacrificing performance — you’re simply choosing smarter tools that respect your space.
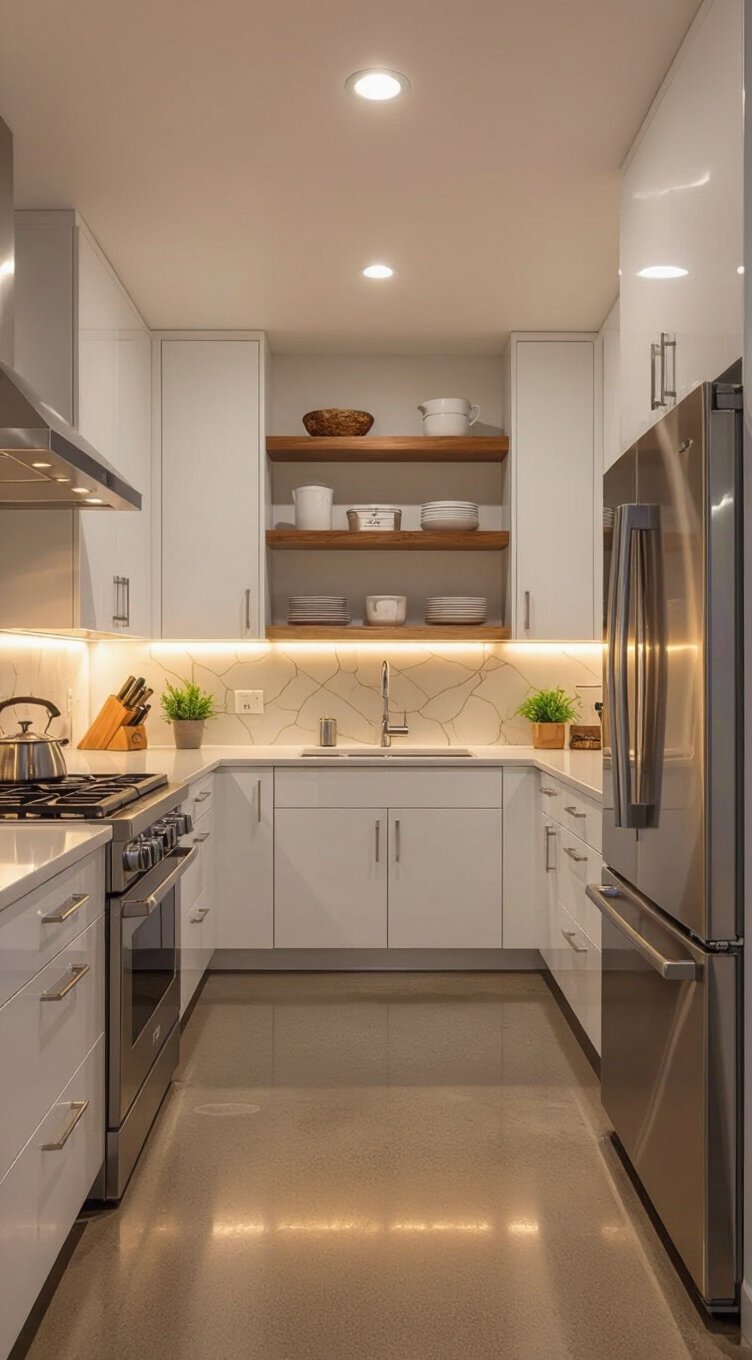
Skip Upper Cabinets on One Wall to Breathe
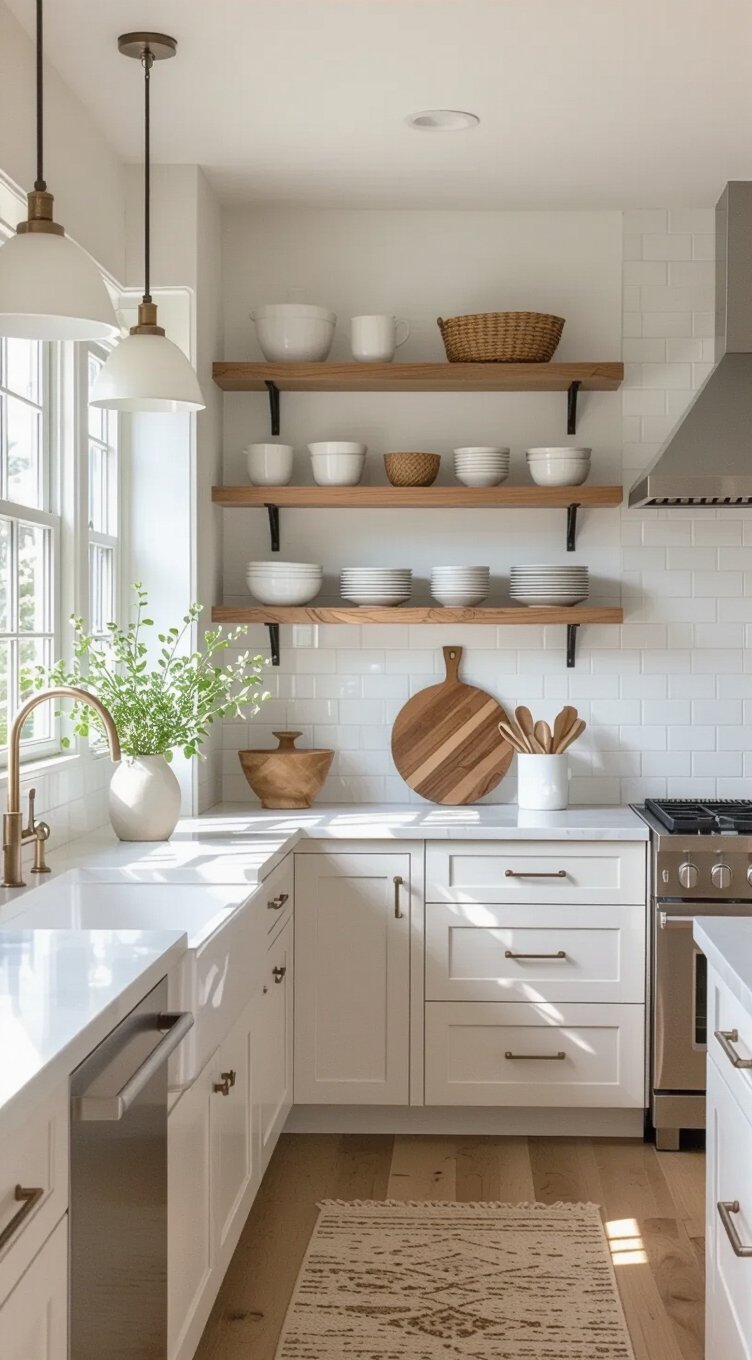
Removing upper cabinets from one wall of your small U-shaped kitchen is one of the smartest design moves you can make. It instantly opens up the space and gives you visual breathing room. Instead of heavy cabinet boxes, install open shelving or floating racks to keep your essentials accessible without closing in the walls. You’ll still have functional storage, but your kitchen won’t feel like a tight box anymore. Style your open shelving with everyday dishes, glassware, or small plants to add personality. Floating racks work especially well above a sink wall, keeping cooking tools within reach. This approach lets you control your space rather than letting bulky cabinetry control you. It’s a simple change that delivers significant results.
Maximize Vertical Space With Floor-To-Ceiling Cabinets
While skipping upper cabinets on one wall creates breathing room, going floor-to-ceiling on the opposite walls gives you back serious storage power. These tall cabinets reclaim every inch of vertical space you’d otherwise waste, giving you true freedom from clutter. You can store seasonal items on the highest shelves and keep everyday essentials within easy reach below.
Combine your floor-to-ceiling cabinets with wall mounted racks inside the doors for extra organization. Add hanging rods beneath shelves to hold mugs, utensils, or small baskets efficiently. This layered approach maximizes your U-shaped kitchen without crowding your movement zones.
Choose cabinets with clean lines and integrated handles to keep the space feeling open. Lighter cabinet colors also reflect light, making your kitchen feel larger than it actually is.
Use Corner Space Smarter With Lazy Susans and Pull-Outs
Corner cabinets in a U-shaped kitchen can feel like dead zones, but smart accessories convert them into highly functional storage. You don’t have to lose important space to awkward angles anymore. Installing rotating shelves, commonly called Lazy Susans, lets you spin items into view instantly without digging through cluttered depths. You’ll access everything effortlessly, giving you complete control over your kitchen organization.
Pull-out sliding trays work equally well, especially in blind corner cabinets where rotating shelves won’t fit properly. These trays glide smoothly outward, revealing hidden items you’d otherwise forget about. Consider these practical upgrades:
- Full-circle Lazy Susans for wide corner cabinets
- D-shaped rotating shelves for tighter spaces
- Sliding trays with soft-close mechanisms for quiet, reliable access
Both solutions maximize every inch you own.
Pull-Out Drawers Beat Deep Cabinets Every Time
Deep cabinets look spacious until you’re on your knees searching for a pot buried in the back. Pull-out drawers eliminate that frustration entirely, giving you full access to everything inside. You’ll stop losing items in hidden compartments that standard shelving creates naturally. Instead, slide out trays bring your entire cabinet contents directly to you. Install full-extension drawer systems that reach 100% of the cabinet depth, so nothing disappears behind something else. Use tiered pull-outs for pots and pans, separating lids from bases efficiently. Add shallow slide out trays at different heights to maximize vertical space. You’ll reclaim control over your storage without digging or guessing. Every item stays visible, reachable, and organized exactly where you need it.
Bring in Natural Light With a Well-Placed Window
Storage solutions keep your kitchen functional, but lighting changes how the entire space feels. Smart window placement alters a cramped U-shaped kitchen into an open, inviting workspace you’ll actually enjoy using.
Position your window above the sink along the middle wall for maximum daylight optimization. This location captures the most natural light while giving you a pleasant view during meal prep. A window measuring 30 to 36 inches wide works well without sacrificing cabinet storage.
Consider these placement strategies:
- Center the window on your longest wall to distribute light evenly across all three sides.
- Choose casement windows that open fully, improving ventilation alongside brightness.
- Add a shallow sill for small herbs, keeping the space practical and personal.
Natural light makes your kitchen feel bigger without spending a dollar on renovation.
Use Open Shelving to Avoid a Boxed-In Feel
While upper cabinets maximize storage, they can make a small U-shaped kitchen feel like the walls are closing in. Swapping some cabinets for open shelving instantly opens up your space and gives you visual breathing room.
Try these three approaches to free up your kitchen:
- Replace top cabinets on one wall with wall mounted storage shelves to break the visual heaviness without sacrificing functionality.
- Display everyday essentials like dishes, glasses, and spices on open shelving so everything you need stays within easy reach.
- Mix materials strategically by combining floating wood shelves with metal brackets to add personality and depth.
You’ll find that open shelving converts a tight U-shaped kitchen from a cramped workspace into an inviting, functional area you’ll actually enjoy using.
Mount Appliances to Free Up Counter Space
Counter space is precious in a small U-shaped kitchen, and mounted appliances are one of the smartest ways to reclaim it. Wall mounting your microwave, for example, instantly frees up essential prep space below. You can also install appliance shelves specifically designed to hold coffee makers, toasters, or small blenders at eye level. This approach keeps your countertops clear while putting everything within easy reach. Consider mounting your range hood higher and tucking a compact microwave into a dedicated wall cabinet. You’ll gain more room to chop, mix, and cook without feeling cramped. Appliance shelves with built-in outlets make this setup even more functional. When your appliances work with your walls instead of against your counter space, your kitchen truly works for you.
Stick to One Countertop Material Throughout
One simple design choice can make your small U-shaped kitchen feel instantly larger and more cohesive: sticking to a single countertop material throughout. Countertop consistency eliminates visual breaks that make compact spaces feel choppy and disconnected. Material uniformity lets your eye travel smoothly across all three walls, creating a seamless, open flow.
Here’s how this strategy works for you:
- Choose versatile materials like quartz or butcher block that handle prep, heat, and daily wear confidently.
- Match edge profiles consistently across every counter section to strengthen that unified, uninterrupted look.
- Coordinate your backsplash with your chosen material so the entire workspace feels intentionally designed.
You’ll spend less time second-guessing design decisions and more time actually enjoying your kitchen’s clean, liberated aesthetic.
Add a Peninsula for Extra Surface and Seating
Your countertops now feel cohesive and unified, so it’s time to think about adding more functional surface area with a peninsula. This countertop extension connects directly to your existing cabinetry, giving you extra prep space without sacrificing your open layout. Unlike a floating island, a peninsula keeps one end anchored, making it more practical for tight U-shaped kitchens.
You can design it specifically for island seating by extending the overhang 12 to 15 inches on one side. This overpack comfortably fits two or three bar stools underneath. You’re fundamentally creating a casual dining spot without adding a separate table. Choose stools that slide fully beneath the counter to keep pathways clear. This simple addition reshapes your kitchen into a more versatile, hardworking space you’ll genuinely enjoy using daily.
Roll in a Narrow Cart When You Need More Storage
When counter space runs short in a small U-shaped kitchen, a narrow rolling cart gives you an instant, flexible solution. You can tuck it away when it’s not needed and roll it out whenever you require extra prep space or storage. These narrow cart solutions put you in control of your kitchen layout without permanent commitments.
Choose the right cart by considering these three features:
- Width under 18 inches — it slides easily between cabinets without blocking your workflow.
- Shelves or drawers — open shelves display spices and tools, while drawers hide clutter efficiently.
- Locking wheels — they keep your cart stable during food prep and secure when parked.
Roll out storage converts dead floor space into a practical, movable workspace you’ll actually use.
Use Layered Lighting to Make Every Inch Work Harder
Lighting changes a small U-shaped kitchen from a cramped workspace into a bright, functional area you’ll enjoy cooking in every day. Layer your lighting strategically to access every inch of potential your kitchen holds.
Start with these three lighting layers:
- Ambient lighting — Install recessed ceiling lights to spread even, general illumination throughout the space.
- Under cabinet lighting — Mount LED strips beneath your upper cabinets to eliminate shadows on your countertops, making meal prep safer and easier.
- Pendant lighting — Hang one or two pendants above your peninsula or sink to add focused task lighting plus visual interest.
Together, these layers give you complete control over your kitchen’s atmosphere. You’ll work more efficiently, see clearly, and actually enjoy spending time in your compact U-shaped space.
Frequently Asked Questions
Can a U-Shaped Kitchen Work Well in an Open-Plan Home?
Yes, a U-shaped kitchen can absolutely thrive in an open-plan integration! You’ll maintain visual flow by choosing open shelving and consistent finishes, letting your space breathe freely while keeping your cooking zone beautifully defined and unrestricted.
What Flooring Materials Work Best Inside a Small U-Shaped Kitchen?
For your small U-shaped kitchen, choose luxury vinyl or ceramic tile — they’re perfect for easy maintenance and space optimization. You’ll enjoy durable, stylish floors that let you move freely without worrying about constant upkeep or restrictions.
How Do I Ventilate a Small U-Shaped Kitchen Without Losing Space?
Install a slim, wall-mounted range hood above your stove to capture smoke efficiently. You’ll also maximize airflow by adding a compact ceiling fan, keeping your kitchen fresh without sacrificing your precious counter or cabinet space.
Should I Hire a Professional Designer for My Small U-Shaped Kitchen?
You don’t always need one! If budget considerations are tight, you can DIY your layout. But for complex design customization, hiring a professional frees you to get the most efficient, personalized u-shaped kitchen without costly mistakes.
Can a U-Shaped Kitchen Layout Increase My Home’s Resale Value?
Yes, a U-shaped kitchen can elevate your home’s resale value! You’ll enjoy increased functionality that attracts buyers, while enhanced aesthetics make your space irresistible, giving you the freedom to command a higher selling price confidently.
Conclusion
Your small U-shaped kitchen can work harder than you think with the right design choices. By keeping walkways clear, choosing smart storage, and using light colors, you’ll change even the tightest space into an efficient cooking zone. Don’t overlook the small upgrades—a rolling cart, open shelves, or layered lighting can make a real difference. Start with one or two changes, and you’ll quickly see how every inch counts.