
How to Build Kitchen Cabinets Without Going Broke
Look, building your own kitchen cabinets isn’t just for woodworking wizards or people with too much time on their hands. It’s actually a totally doable weekend project that can save you thousands of dollars and give you exactly what you want. Sure, you could buy pre-made cabinets, but where’s the fun in that?
Getting Your Game Plan Together
Before you start cutting wood like a maniac, you need a solid plan. Measure your kitchen space three times, write it down, then measure again because trust me, you don’t want to build a cabinet that’s half an inch too wide.
Sketch out your design on paper or use free online planning tools. Think about what you actually need: deep drawers for pots and pans, tall cabinets for baking sheets, or maybe a spot for your embarrassingly large collection of coffee mugs. Your kitchen, your rules.
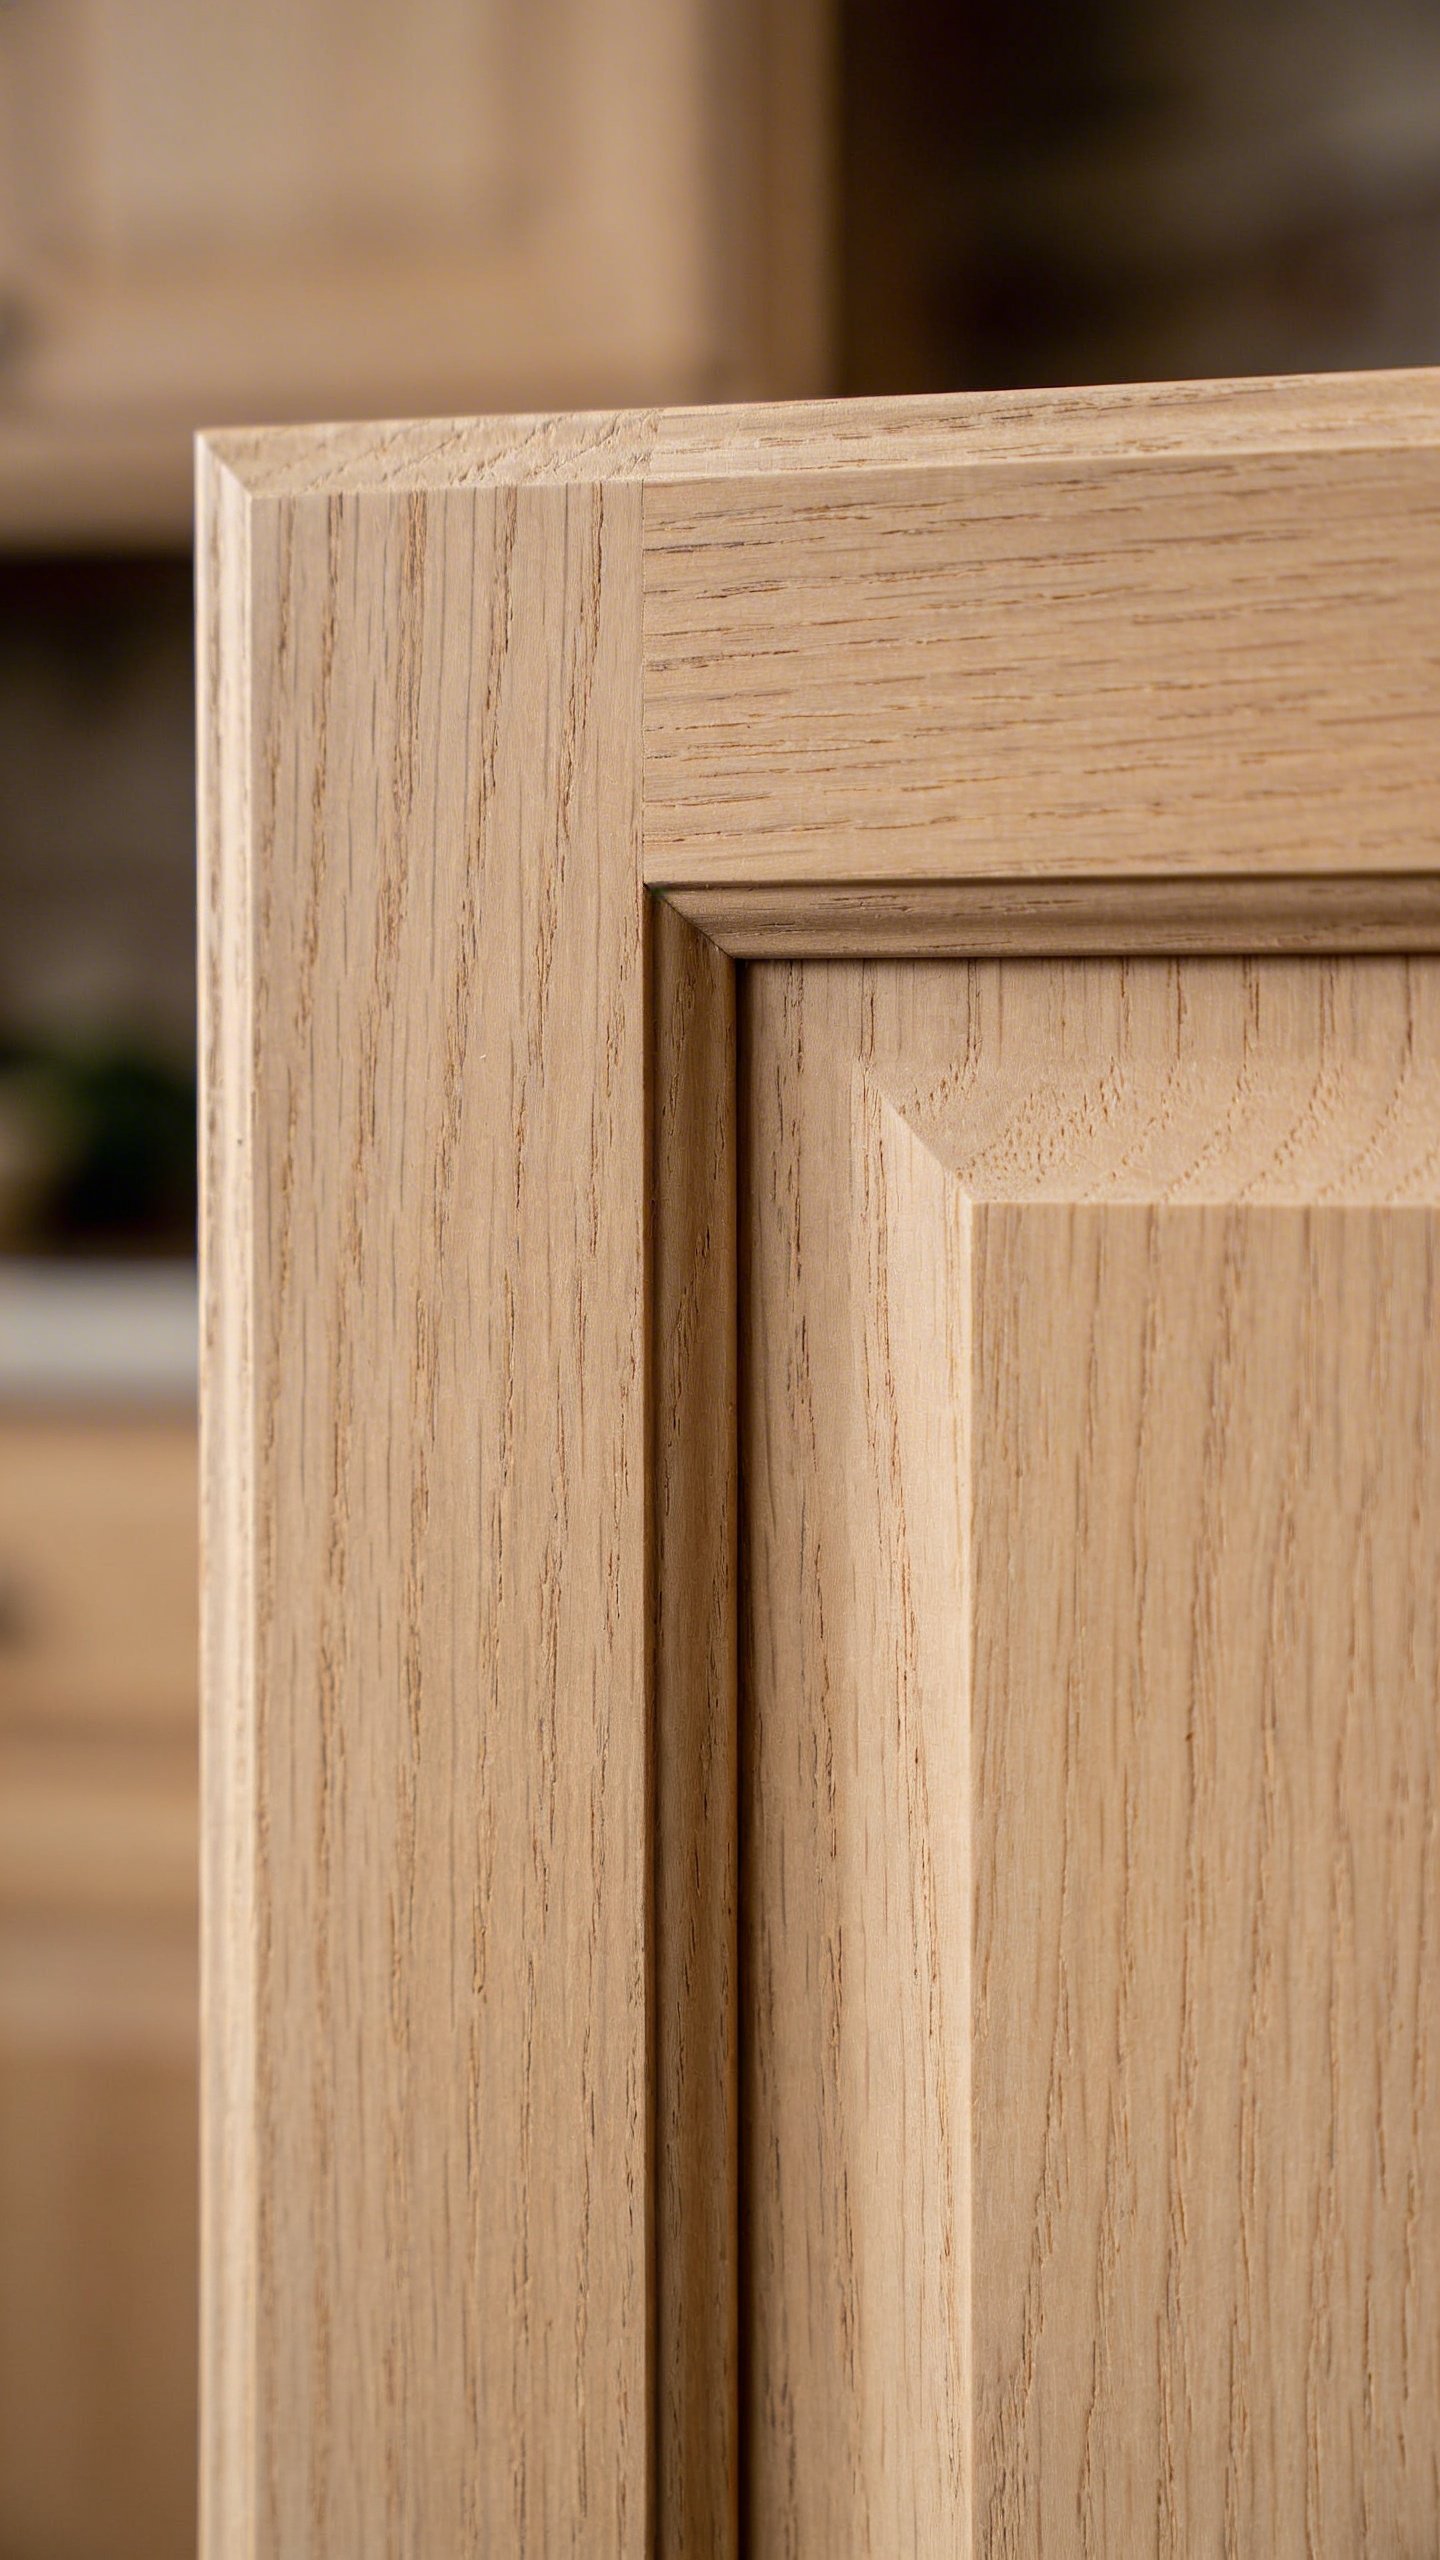
Consider the style you’re going for too. Shaker-style doors are classic and beginner-friendly, while raised panel doors look fancy but require more skill. Start simple, get cocky later.
Tools and Materials You’ll Actually Need
Let’s talk tools. You don’t need a workshop that would make Tim “The Tool Man” Taylor jealous, but you do need some basics.
Essential Tools
- Table saw or circular saw – Your primary cutting weapon
- Drill and driver set – For all those screws you’ll be installing
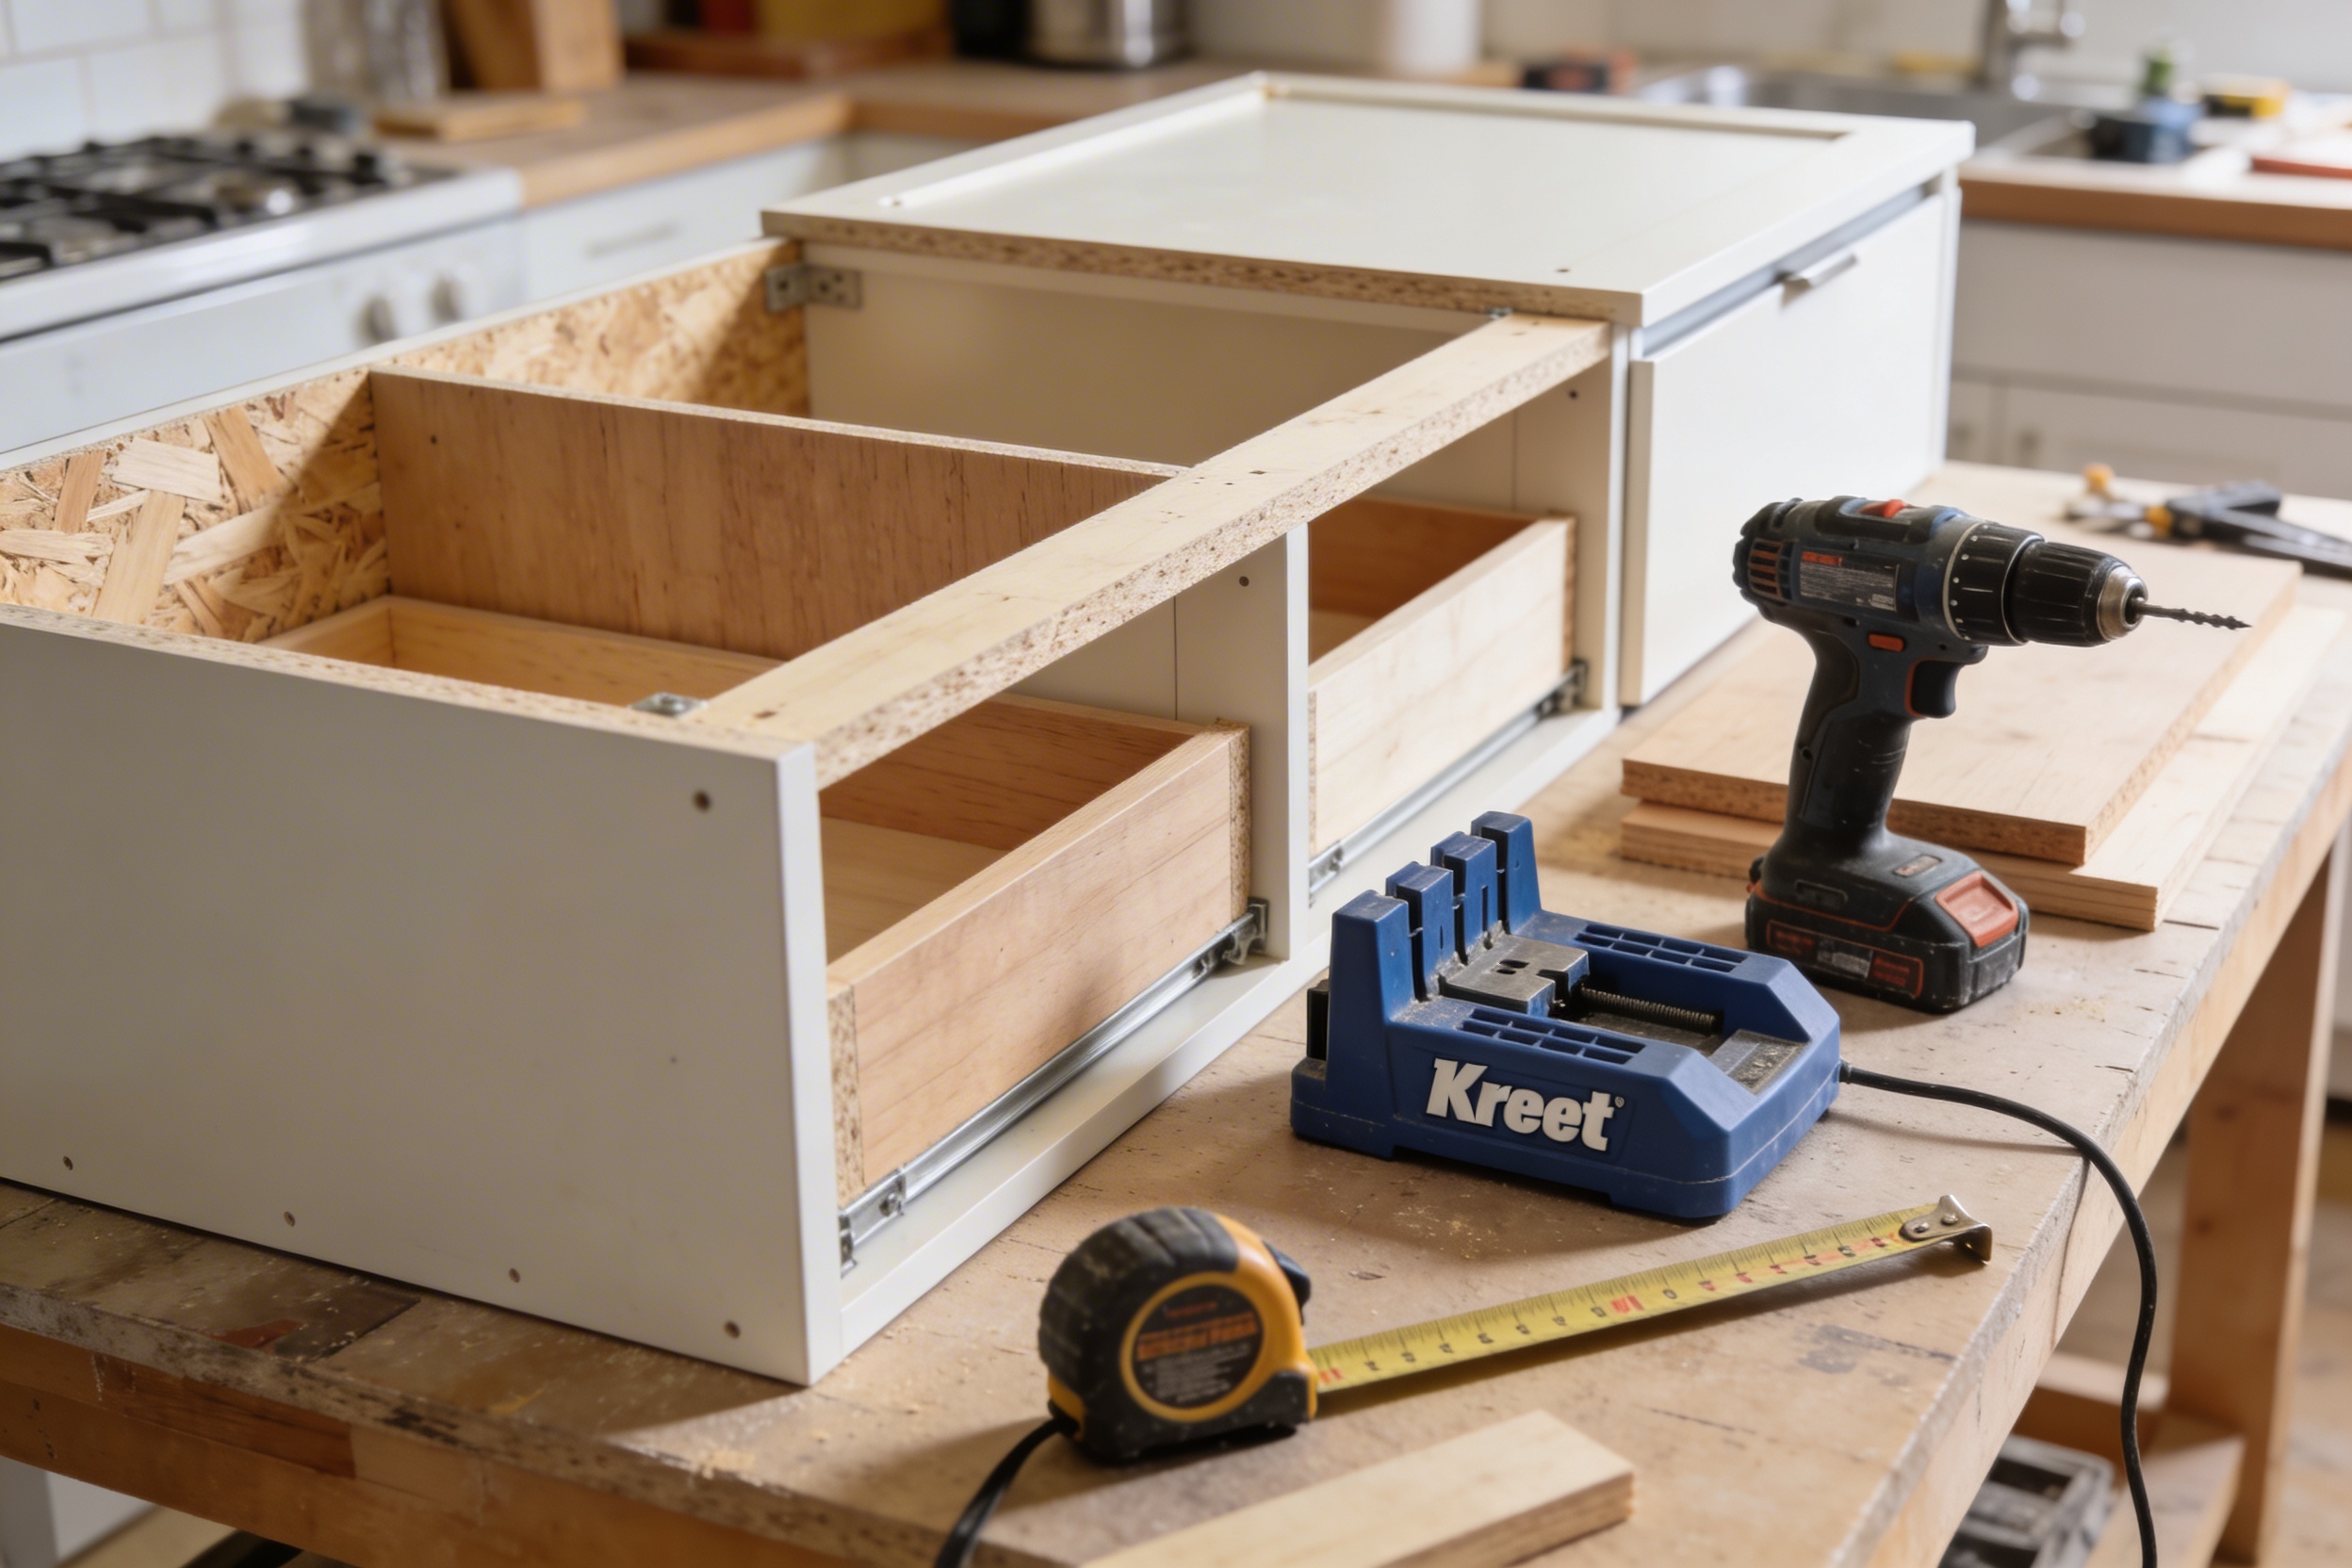
- Kreg jig – Seriously, this pocket hole system is a game-changer
- Measuring tape and square – Because eyeballing it never works out
- Clamps – You can never have too many
- Level – Unless you enjoy crooked cabinets
Material Shopping List
For the cabinet boxes, plywood is your best friend. Go with 3/4-inch for the main structure and 1/4-inch for the backs. Avoid particle board unless you hate yourself and love cabinets that fall apart.
For doors and face frames, hardwood like oak, maple, or birch gives you that professional look. Pine works too if you’re on a budget, but it’s softer and dents easier. FYI, whatever you choose, make sure you buy extra for inevitable mistakes.
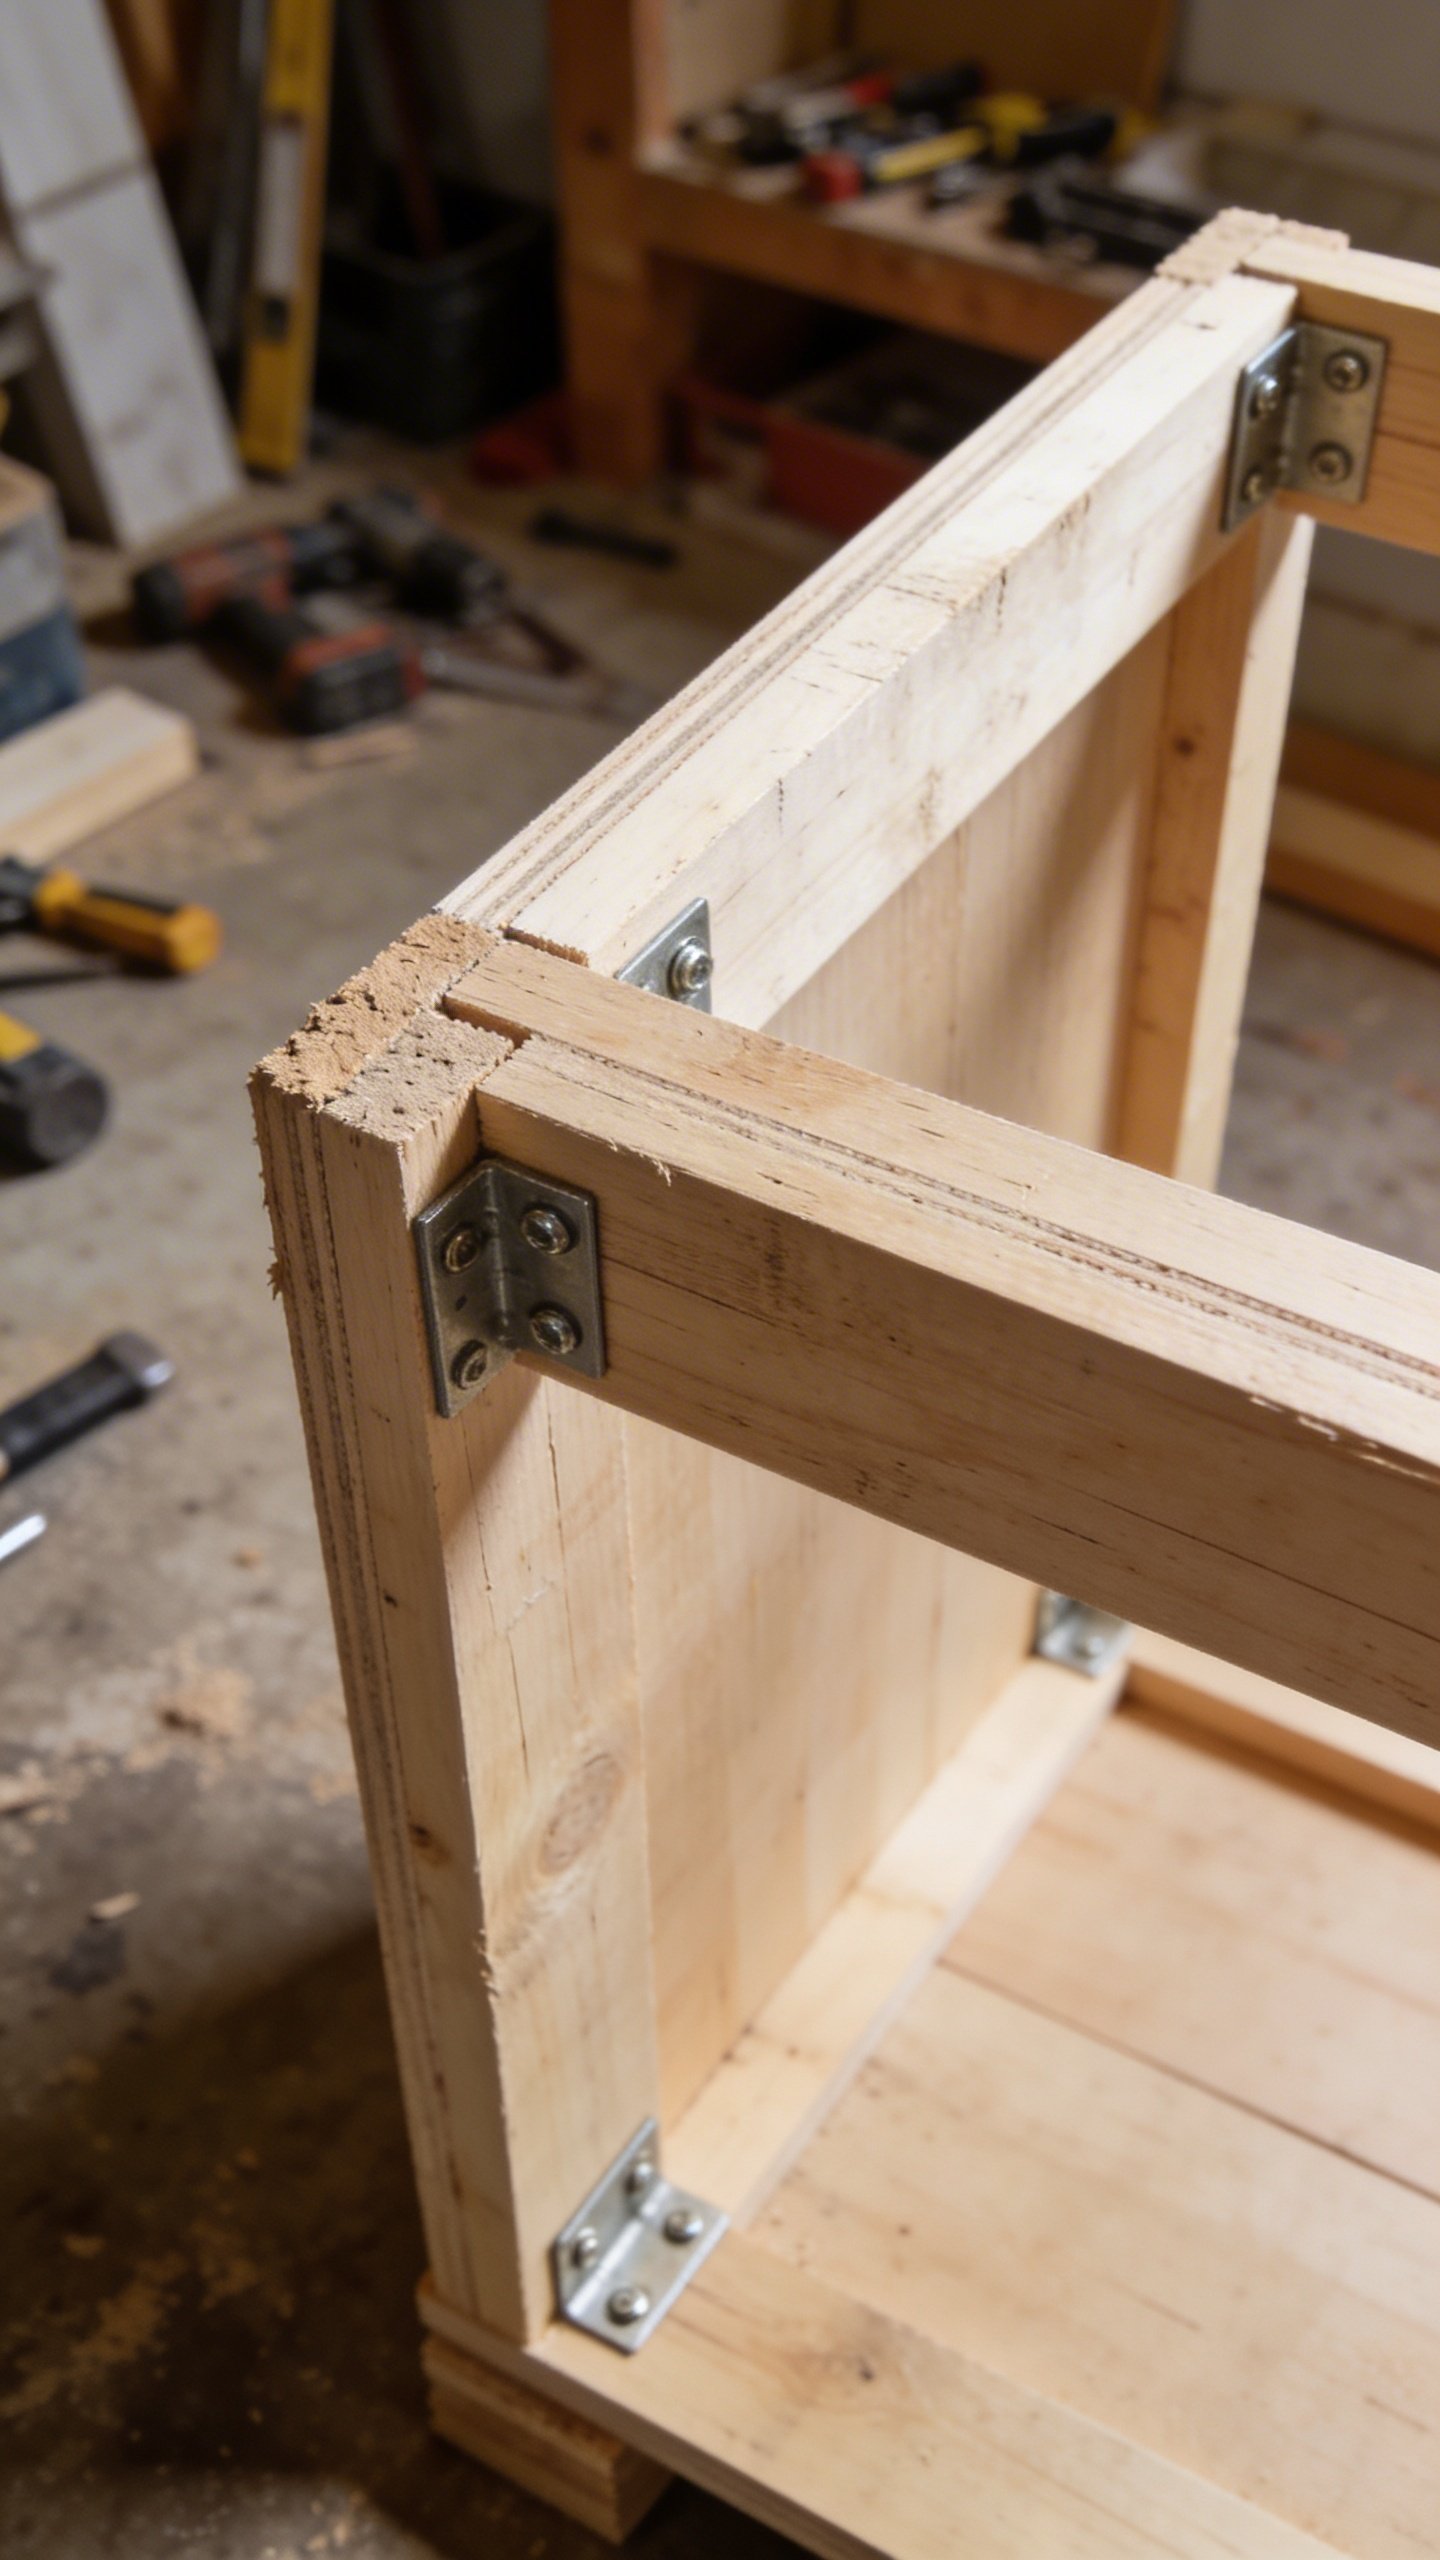
Building the Cabinet Boxes
Here’s where the magic happens. Start with the base cabinets because they’re more forgiving than wall cabinets, and you won’t cry as much if something goes wrong.
Cut your plywood panels for the sides, top, bottom, and back. A standard base cabinet is usually 24 inches deep and 34.5 inches tall. Width depends on your design, but 18-36 inches is common.
Use pocket holes to assemble everything. Seriously, pocket screws make this process so much easier than trying to be a joinery master on your first build. Drill your pocket holes on the inside faces where nobody will see them, then screw the pieces together.
Don’t forget to add a toe kick at the bottom, usually about 4 inches tall. This lets you stand close to the counter without stubbing your toes constantly, which your future self will appreciate.
Face Frames: The Secret to Looking Professional

Face frames are those strips of wood around the front of your cabinet boxes, and they make everything look intentional instead of like you built it in your garage (even though you totally did).
Cut your face frame pieces from 1×2 or 1×3 boards. You’ll need vertical stiles for the sides and horizontal rails for top and bottom. Join them with pocket screws or traditional mortise and tenon joints if you’re feeling ambitious.
Attach the face frame to your cabinet box with glue and brad nails. Make sure everything is flush and square, or it’ll bug you forever. Well, until you rip it out and start over.
Doors and Drawers: The Fun Part
Cabinet doors seem intimidating, but they’re basically just rectangles with attitude. For simple shaker-style doors, you’ll create a frame from your hardwood and insert a plywood panel in the middle.
Cut grooves in your frame pieces to hold the panel, or use a router with a dado bit. Assemble the frame around the panel using glue and clamps. Let it dry completely before you even think about installing hinges.
Drawer Construction 101
Drawers follow the same basic principle as cabinet boxes, just smaller and with a sliding mechanism. Build a box from 1/2-inch plywood, attach drawer slides to both the drawer and the cabinet interior, and boom—you’ve got storage that moves.
Measure your drawer slides before building the drawers. Different slides need different clearances, and discovering this after you’ve built everything is a special kind of heartbreak.
Installation: Where Things Get Real
Installation day is exciting and terrifying in equal measure. Start by finding your studs and marking them clearly. Your cabinets need to attach to studs, not just drywall, unless you enjoy spontaneous cabinet avalanches.
Begin with upper cabinets first—it’s easier than working around base cabinets. Use a level and shims to get everything perfectly straight. Screw through the back of the cabinet into studs with 3-inch screws. Use at least two screws per stud.
For base cabinets, start in a corner and work your way out. Shim the bottoms until they’re level, then screw them together through the face frames. This creates one solid run of cabinets instead of a bunch of individual wobbly boxes.
Finishing Touches That Matter
You’re in the home stretch now. Install your hinges and drawer pulls—this is where you can add personality. Modern pulls, vintage knobs, or sleek hidden hinges all create different vibes.
Sand everything smooth before finishing. Start with 120-grit sandpaper and work up to 220-grit. Yes, it’s tedious. No, you can’t skip it unless you want a finish that highlights every imperfection.
Choose your finish wisely. Polyurethane is durable and waterproof, perfect for kitchens. Oil-based poly looks warmer but takes forever to dry. Water-based dries fast but can raise the wood grain. Paint works great too and hides minor mistakes like a champ.
Frequently Asked Questions
How much money will I actually save building my own cabinets?
Honestly? You can save 50-75% compared to custom cabinets, which is huge. Basic materials for a full kitchen might run you $1,000-$2,000, while custom cabinets could easily hit $10,000 or more. Even with tool purchases, you’ll come out ahead if you’re doing a whole kitchen.
How long does it take to build kitchen cabinets?
Plan on a few weekends for a complete kitchen if you’re working solo and learning as you go. One cabinet might take 4-6 hours once you get the hang of it. Your first one will take longer because you’ll measure everything seventeen times and question all your life choices.
Can I really do this without woodworking experience?
Absolutely. IMO, building cabinets is more about patience and following instructions than natural talent. Start with one simple cabinet to learn the process. If it doesn’t collapse, make another. You’ll be surprised how quickly you improve.
What’s the biggest mistake beginners make?
Not accounting for the thickness of materials in their measurements. Your cabinet opening needs to be smaller than the space to account for face frames, doors, and clearances. Also, buying cheap plywood that warps or delaminates—don’t do this to yourself.
Do I need a full workshop to pull this off?
Nope. A garage or even a driveway works fine. You need space to cut plywood sheets and assemble boxes, but you don’t need a dedicated woodshop. Lots of people build amazing cabinets with just a circular saw and some sawhorses.
Should I use plywood or solid wood for cabinet boxes?
Plywood wins here, hands down. It’s more stable than solid wood, won’t expand and contract as much, and it’s actually stronger for cabinet construction. Save solid wood for face frames, doors, and anywhere it’ll be visible.
Wrapping This Up
Building your own kitchen cabinets is totally within your reach, even if you’ve never attempted anything like this before. Yeah, it takes time and effort, but you’ll end up with custom cabinets that fit your space perfectly and didn’t cost you a kidney.
Start small, maybe with a single base cabinet or a simple wall unit. Once you’ve got the process down, you can tackle your whole kitchen with confidence. And when people ask where you got your amazing cabinets, you get to casually mention you built them yourself. That feeling alone is worth the sawdust in your hair.